Fell Friday #36 - New map and new monster
First, a quick reminder: we'll be at PAX East from April 5th to April 8th. Drop by our booth and say hi! :)
As for progress, on the programming side: mainly wrapping up the next story encounter. We also updated the class selection screen to show more information, including the stats growth of the selected class as well as showing the usual character panel for more clarity on the currently selected character. Here's what the new screen looks like:

Next, we got our classes and abilities data exported to an XML (that's visible to modders) and implemented a system to easily override/add to those XMLs. Modders should be able to add new classes and abilities very easily and even do a "total conversion" of classes if they feel like it.
Finally, we redid the way our textures are handled in game, which saved us 500MBs of install space and about 200MBs of RAM/VRAM while running the game. For anyone interested, I'll have a technical bit at the end of this post explaining the whole process (lengthy stuff, sorry!).
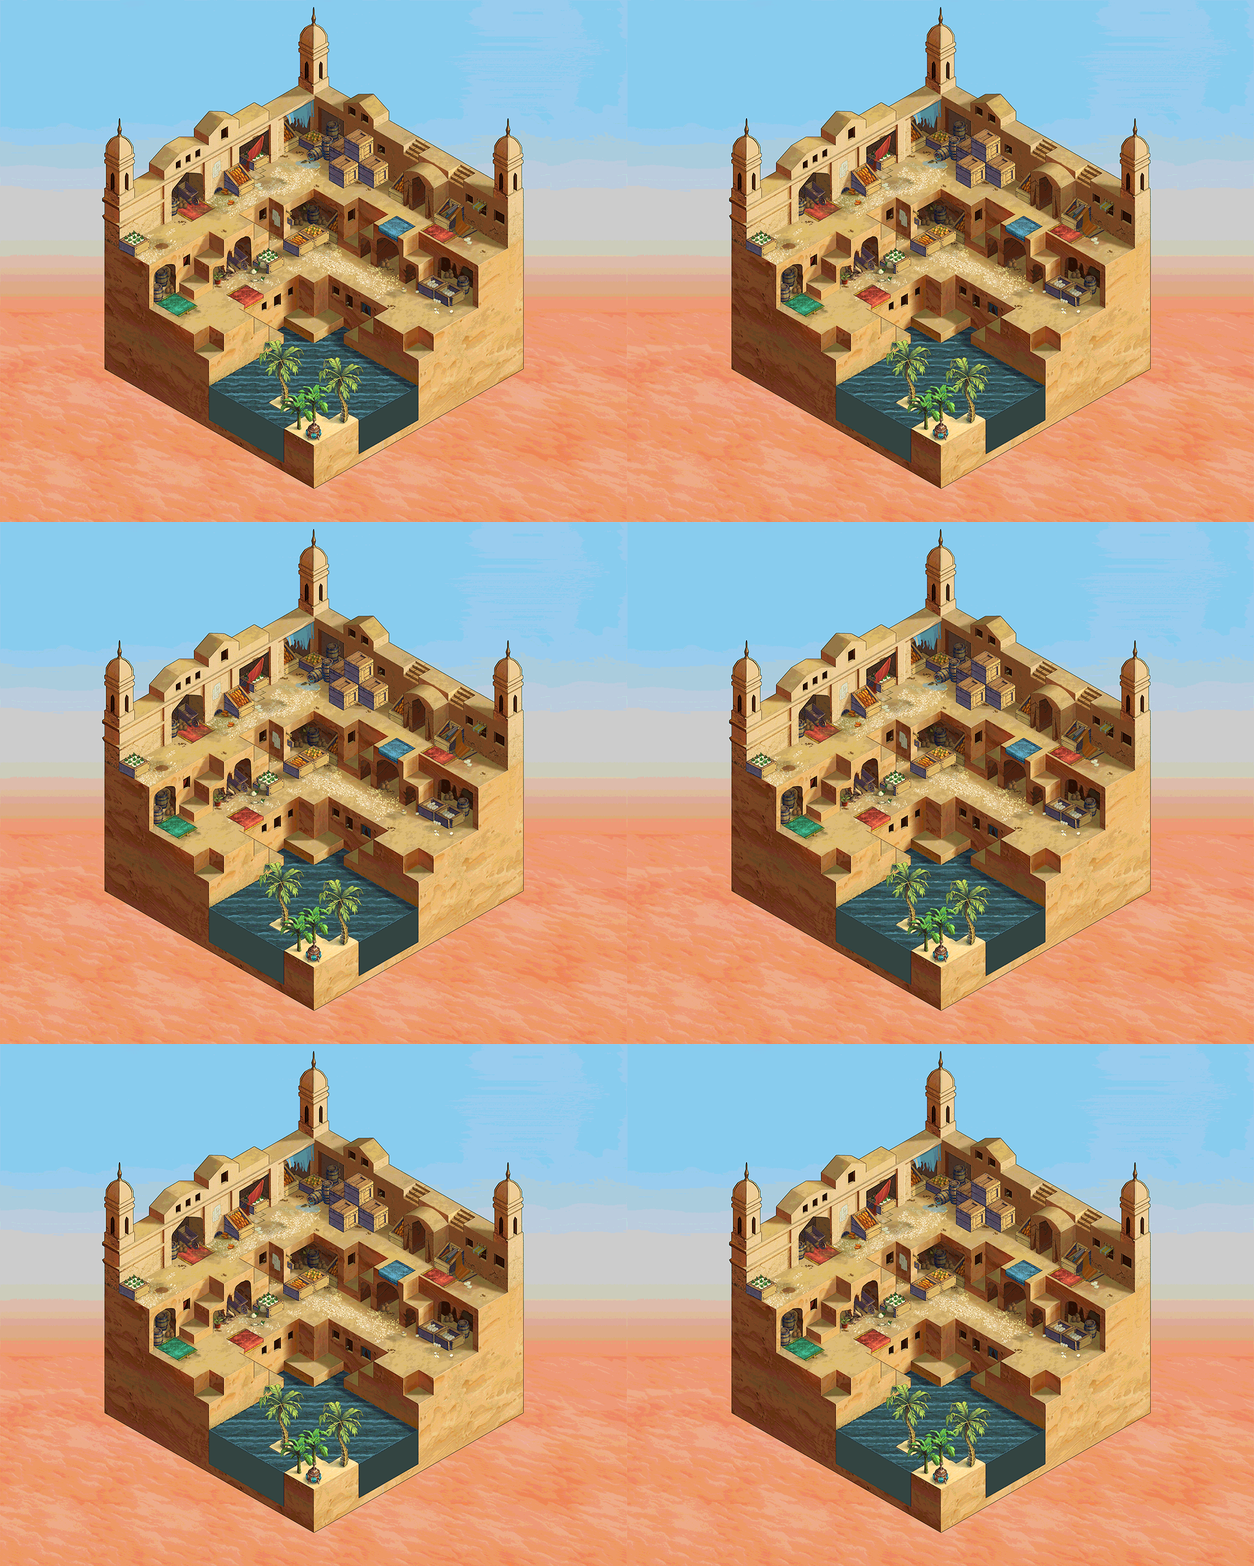
On the art side, we got a new map done and a new monster this week. The map is a town style area and is still awaiting a quick final polish pass, but it should end up looking pretty much like this:

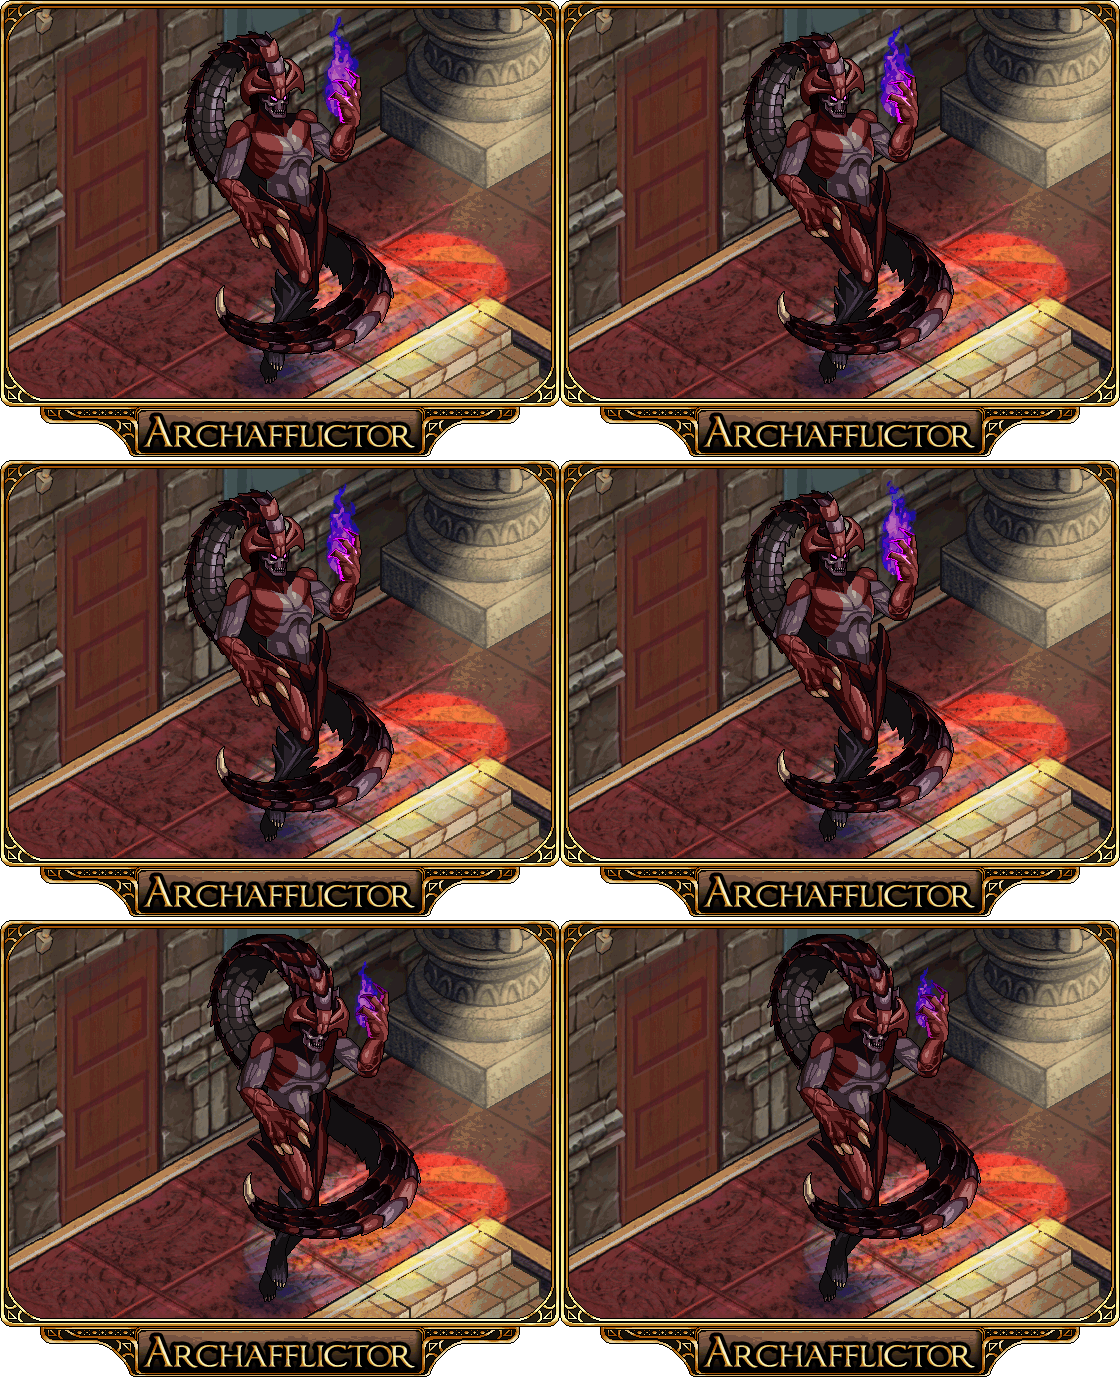
And here's our new monster (as can be seen, he's based of our first boss sprite): another vicious demon that will be used somewhat sparingly because he's just that powerful:

That's it for this week!
We hope to see everyone at our PAX East booth! :)
Thanks!
And now for the technical bit about our new texture system:
We have a LOT of different outfits for the player to choose from and we've been offering them in 12 different colors. This selection grew over time and it was just adding "1 more set of clothes" until eventually we ended up with over one hundred 2048x2048x32bits texture atlases containing clothing sets of various colors.
When looking at a specific set of clothing (say, the Princess outfit), we have 12 variations of it, but they are for the most part the same image with different colors. Most of those sets will probably have around 50 total colors and the way they were created, they won't necessarily have an exact 1 to 1 palette mappings, but very close (close enough to call it identical for now).
So we decided to go old school and create a main outfit image with a bunch of palettes for each 12 colors. Modern engines don't really like palettes though, so we had to rely on a custom shader to get there. Here's the big picture:
- Run over all 12 different images for a specific set of clothes (each image has a "color variation for the set") and create a base paletted image. Since they are basically identical other than having different colors, that's fairly trivial. Then generate the 12 palettes for the image.
- Store all palettes in a 256x256x32bits texture, each on its own texture row (we optimize things a little more than that, but that's the overall idea). Each row contains a "color set" for the outfit. For example, row 0 is "Red", row 1 is "Orange" and row 2 is "Pink", etc. Each row is basically one of the palettes that can be applied to the 1 image.
- Then store the resulting 1 image as a texture (still 32 bits). That image only makes use of 1 channel (we picked the R channel) and contains indices that point to the correct color on a palette row. That means that image is "useless" without the the associated palette and you can't really see what it is without combining the 2 sets of data with the proper shader.
- This brings us to the shader. The shader is fairly simple (since this was pretty much my first 'real' shader, I had to look up how to set it up, so it is based on a shader by Daniel Branicki (https://gamedevelopment.tutsplus.com/tutorials/how-to-use-a-shader-to-dynamically-swap-a-sprites-colors--cms-25129) with a slew of improvements).
What it roughly does is:
when sampling the original image (that's the image we generated, which contains indices to the palette in its R channel), it also accesses a 2nd texture (the 256x256x32bits palette we created) and uses the sampled R channel as an index to select the right color on a row of our palette and uses that color for output, rather than the color that was contained in the original image. The last part to make the shader work is providing a palette row number via a shader property upon instantiating it (called _Palette). Here's the 2 critical lines of the shader, for a rough idea:
fixed4 sampledPixel = SampleSpriteTexture(IN.texcoord); // Get the pixel we're rendering currently in the sprite texture
fixed4 finalCol = tex2D(_SwapTex, float2(sampledPixel.r, _Palette)); // Use pixel R to find color in palette texture, then plop said color
This basically says: Final Color = Check Our Palette Texture at coords (sampledPixel.R, Palette Number)
So, say we want the Orange variation of the Princess outfit. Orange was row 1, so we tell our shader to use palette 1 (which then becomes the y coordinate for the 2nd texture) and when rendering the Princess outfit, we sample our original image, get the x coordinate (index) from its R channel and we thus have our x,y coordinate within our 2nd texture, which contains the paletted color to use.
Heres' what the paletted texture looks like for us at this point (it's not being too clever with color reuse):

As you can tell, it's only using a small amount of the 256 rows it has available. Each row contains a series of colors, which a sprite maps to to get its real color.
For anyone familiar with paletted 8bits images (like 8bits PNGs), it's the exact same concept except that we use our own shader to do the indexing rather than letting the video card do it for us (since we can't do that nowadays it seems).
A couple extra "gotchas" to keep in mind: texture compression MUST be disabled both for the new image and for its resulting palette, otherwise things don't work at all (image compressed) or look really terrible (palette compressed). Since compression isn't lossless, it'll break things in horrible ways if you leave it on.
Lots of optimizations can be applied to the above model though... The astute reader might have noticed that the above method is storing an 8bit index in 4 bytes (but only using the R channel, and ignoring channels G, B and A), which is very inefficient to say the least. As an example, where before we had an image taking 2048x2048x4bytes using texture compression (so size /4) = 2048x2048 bytes, we would now have an image taking 2048x2048x4bytes (no texture compression), which is 4x as big as before. That's not great.
Still, we have to remember we had 12 "colored images" before, which we turned to "1 base image + 1 palette", so that's still 3x as small as before (2048x2048 * 12 (old textures) vs 2048x2048x4bytes * 1 (for new texture)) if we discount the tiny palette data.
But, we can do a LOT better than this still. As we said, we're storing our data only in the R channel of a texture, which leaves 3 channels completely empty and unused. The obvious solution is to actually store stuff in those channels too.
So, in our example, we now look at 4 different outfits (princess, pirate, knight and rogue, say). Each have their 12 palettes. We process them all like above and end up with
4 images of 2048x2048x4bytes (but with only 1 channel used)
1 palette with 12 * 4 color entries (one for each of the 12 colors * 4 images).
Next step is we combined all 4 images into 1 "super image" by storing one of the images in the G channel, one in the B channel and one in the A channel. Now our final texture is:
1 image of 2048x2048x4bytes non compressed, which contains 1 image in EACH channel RGBA, for 4 images total.
Next, we tell unity when importing the image that the Alpha channel is NOT transparency (otherwise it does weird optimization that breaks our pixels) and we modify our shader to pass it a 2nd parameter: channel.
Now, when our shader renders the final image, it'll also check the which channel is the image data is on.
So now our shader has 2 properties we must set when loading an image: which channel is our image data stored on and which palette it is using. This is our new shader main line:
fixed4 sampledPixel = SampleSpriteTexture(IN.texcoord); // Get the pixel we're rendering currently in the sprite texture
fixed4 finalCol = tex2D(_SwapTex, float2(sampledPixel[_Channel], _Palette)); // Use the correct channel (R, G, B or A) and the wanted palette to select the final color.
This basically says: Final Color = Check Our Palette Texture at coords (sampledPixel Wanted Channel, Palette Number)
And the result is that we're now using the same amount of memory per texture as we would with the compressed image, ie:
Regular texture to get 4 outfits, we need 4x 2048x2048x4bytes / 4 (compression) = 4x 2048x2048.
Paletted, we need 1x 2048x2048x4bytes (with 1 image in each channel) = 4x 2048x2048.
And now for our 12 original color sets, we're actually saving 12x the space. So our 100 texture atlases became 8 texture atlases.
The upsides are that we're saving a lot of RAM and disk space and that adding new palettes doesn't bloat our textures at all. Also, we're not using texture compression, so there is no risk of degraded image quality w/r to our original textures.
The downsides are we're using a custom shader that uses 2 textures, which is less efficient than just rendering plain images and we have weird unreadable images to look at, which no graphics software can interact properly with (which we don't really care about honestly).
Also, we can't use the Unity builtin "texture atlasing", but we never used it because it's slow and inefficient and ours is much better, so that also doesn't matter. But it does mean that you need to process your own atlases to use this technique, which means an added tool of some sort.
Here's what a final 4 layered image looks like:

This is basically 4 atlases fused together, so it looks quite weird. The white lines are unity's rectboxes for all the sprites in the atlas, but since there are 4 'depth' of them, there's a lot of overlapping rectangles, which is pretty silly looking. This specific atlas contains 934 different sprites characters, each with many frames, for a total of 13,287 unique sprite frames (woah, that's way more than I expected).
That's the gist of it. I hope people found it interesting! :)


